


We may earn money or products from the companies mentioned in this post.
Introduction
Welcome to my blog on “10 Easy Pumpkin Carving Ideas for Beginners”! Halloween is just around the corner, and carving pumpkins has become a beloved tradition during this spooky season. Whether you’re new to pumpkin carving or just looking for some fresh inspiration, this post is for you!
The tradition of pumpkin carving
Pumpkin carving has a rich history that dates back centuries. The tradition began with the Celts, who carved turnips and other root vegetables to ward off evil spirits. When Irish immigrants arrived in America, they discovered the pumpkin’s suitability for carving and embraced it as their new canvas. Today, pumpkin carving is an essential part of Halloween festivities.
Why pumpkin carving is popular
Pumpkin carving has surged in popularity for several reasons. It allows us to channel our creativity and express ourselves through art. The process is both therapeutic and satisfying, offering a sense of accomplishment when we see the finished masterpiece glowing on our porch. Moreover, pumpkin carving is a fantastic activity that brings families and friends together, fostering a sense of togetherness and bonding during the holiday season.
Finding inspiration for pumpkin designs
If you’re unsure of what design to carve, don’t worry! There are countless sources of inspiration available. From traditional jack-o’-lantern faces to intricate patterns and even pop culture references, the possibilities are endless. Look online, browse through pumpkin carving books, or even draw inspiration from nature, movies, or your favorite characters.
So, gear up with your carving tools and prepare to unleash your inner artist with these 10 easy pumpkin carving ideas for beginners! Let’s dive in and have a spooktacular time!

Safety Precautions
Carving pumpkins can be a fun and rewarding activity, especially for beginners. However, it’s important to prioritize safety to ensure a smooth and enjoyable carving experience. Here are some essential safety precautions to keep in mind:
Choosing the Right Tools
When it comes to pumpkin carving, using the right tools is crucial. Opt for pumpkin carving kits that come with specially designed tools, such as serrated knives and scoop tools, to make the process easier and safer. Avoid using regular kitchen knives or sharp objects that may cause accidents.
Protective Gear for Carving
To protect your hands and fingers, consider wearing gloves while carving. This will provide better grip and reduce the risk of accidental cuts. Additionally, wearing safety glasses or goggles can shield your eyes from flying pumpkin bits and keep your vision clear.
Carving in a Well-Ventilated Area
Carving pumpkins can generate a lot of dust and debris, which can be harmful when inhaled. It’s important to carve in a well-ventilated area, such as outdoors or near an open window. This will help minimize exposure to airborne particles and ensure better breathing conditions.
Supervising Children During Carving
If children are joining in on the pumpkin carving fun, make sure to supervise them closely. Provide them with age-appropriate tools and teach them how to handle them safely. Keep sharp objects out of their reach when not in use and remind them of the importance of caution and mindfulness while carving.
By following these safety precautions, you can carve your pumpkins confidently and enjoy a delightful Halloween season. Don’t forget to unleash your creativity and have fun experimenting with the various carving techniques!
Selecting the Perfect Pumpkin
When it comes to pumpkin carving, choosing the right pumpkin is crucial. The size and shape of the pumpkin will determine how easy it is to carve and create your desired design. Here are a few tips to help you select the perfect pumpkin for your carving project.
Tips for choosing a pumpkin
First, consider the size of the pumpkin. If you’re a beginner, it’s best to start with a smaller pumpkin. This will make it easier to handle and carve. Look for a pumpkin that is about 8-10 inches in diameter, as this will give you enough space to create your design without feeling overwhelmed.
Ideal size and shape for carving
Next, pay attention to the shape of the pumpkin. Choose one that is round and symmetrical, as this will help you achieve a clean and balanced design. Avoid pumpkins that have irregular shapes or dents, as they can make carving more challenging.
Inspecting the pumpkin for flaws
Before purchasing a pumpkin, carefully inspect it for any flaws or blemishes. Look for smooth, unblemished skin with no soft spots or mold. These flaws can indicate that the pumpkin is not healthy and may not last long after carving.
Ensuring the pumpkin is firm and healthy
Lastly, make sure the pumpkin feels firm and sturdy when you pick it up. Gently tap on the surface to check if it makes a hollow sound. A pumpkin that feels soft or hollow may be rotting from the inside, making it difficult to carve and less likely to last.
Remember, selecting the perfect pumpkin is the first step towards creating a stunning and successful carving masterpiece. So take your time, choose wisely, and have fun with your pumpkin carving adventure!
3. Pumpkin Preparation
Cleaning the pumpkin’s surface
Before you start carving your pumpkin, it’s important to clean its surface thoroughly. Use a damp cloth or sponge to gently wipe away any dirt or debris. This will ensure that your design sticks to the pumpkin easily and looks vibrant and sharp once it’s carved.
Removing the top or bottom lid
Choose whether you want to carve through the top or bottom of the pumpkin. Both options work fine, but removing the lid from the bottom can make it easier to place the pumpkin on top of a light source once it’s carved.
Scooping out the pumpkin’s insides
Grab a sturdy spoon or an ice cream scoop and start hollowing out the pumpkin. Remove all the seeds and stringy bits, making sure the walls are clean and smooth. This step is crucial as it provides an empty canvas for your creative carving.
Thinning the inner walls for easier carving
To make carving easier, thin out the inner walls of the pumpkin using a knife or a pumpkin carving tool. Be careful not to make them too thin, as this may cause the pumpkin to collapse. Aim for a thickness of about an inch for a stable and easy-to-carve pumpkin.
Preparing your pumpkin is the essential first step in creating a fantastic carved masterpiece. Clean the surface, decide on the lid placement, scoop out the insides, and thin the inner walls. Once your pumpkin is prepped and ready, you can move on to the fun part – carving your chosen design!
4. Easy Pumpkin Carving Techniques
Carving a pumpkin can be a fun and creative activity to do, especially for beginners. In this section, I will share with you some easy pumpkin carving techniques that you can try out.
Simple stencil methods
One of the easiest ways to carve a pumpkin is by using stencils. These templates can be found online or in craft stores. Simply print out the design you like, tape it onto your pumpkin, and trace the pattern onto the pumpkin’s surface. Then, carefully carve along the lines using a sharp knife or pumpkin carving tool.
Using freehand sketches
If you’re feeling confident in your artistic skills, freehand sketches can be a great option. Grab a permanent marker and draw directly onto the pumpkin. You can go for a spooky face, a cute design, or whatever you can imagine! Once you have your sketch, use a pumpkin carving tool to carefully cut along the lines.
Creating unique patterns with cookie cutters
Why not get creative with cookie cutters? Find a cookie cutter shape that you like, and press it firmly into the pumpkin’s surface. With a knife, carefully cut along the edges of the shape, creating a unique and eye-catching pattern.
Etching and scraping techniques
For a more subtle, yet still impressive, pumpkin design, try etching and scraping techniques. Use a small, sharp knife or pumpkin carving tool to gently scrape away the pumpkin’s top layer, revealing the lighter, inner flesh. By creating different depths and textures, you can create stunning and detailed designs.
By trying out these easy pumpkin carving techniques, you will be able to create impressive jack-o’-lanterns in no time. Whether you choose to use stencils, freehand sketches, cookie cutters, or etching techniques, the possibilities are endless. So grab a pumpkin and let your creativity shine!
5. Beginner-Friendly Pumpkin Designs
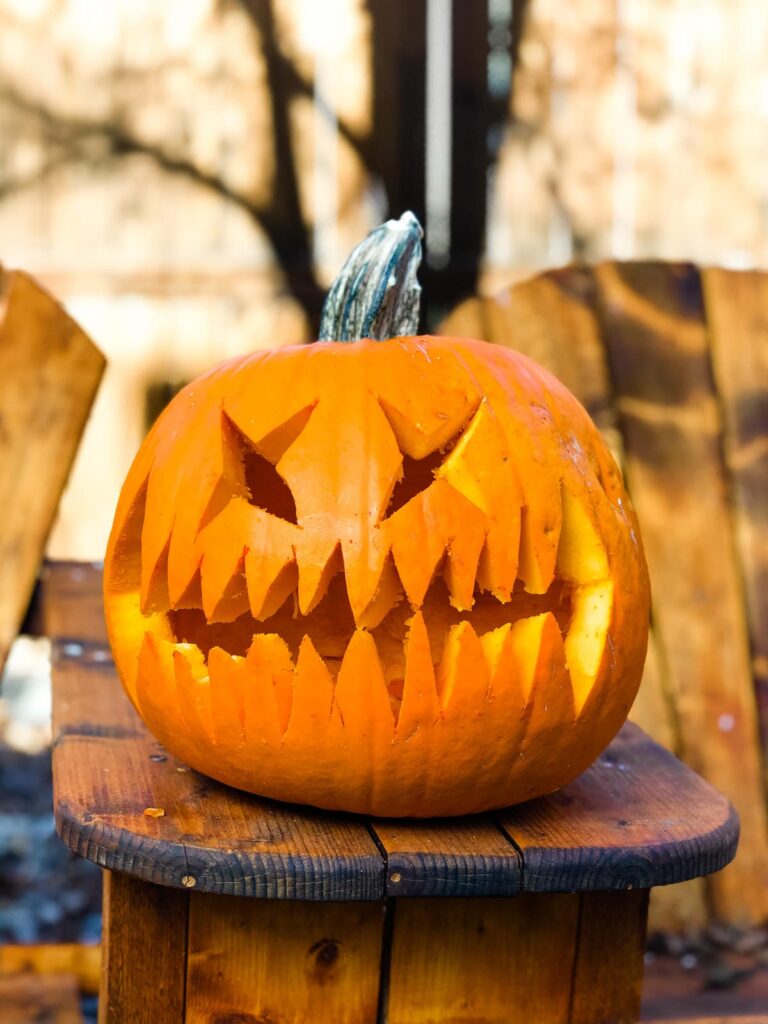
Classic Jack-O’-Lantern face
One of the most iconic and beloved pumpkin carving designs is the classic Jack-O’-Lantern face. With its triangular eyes, a toothy grin, and a jagged nose, this design is perfect for beginners. Simply draw the face on the pumpkin using a pen or marker, then carefully carve along the lines. Remember to scoop out the pumpkin’s insides before carving to make it easier to work with.
Friendly cartoon character carvings
For a fun twist, try carving your favorite friendly cartoon character onto your pumpkin. Whether it’s a cute Disney character or a lovable superhero, this design is sure to make your pumpkin stand out. Find a stencil online, trace it onto the pumpkin, and carefully carve around the outline. Don’t forget to add some details like eyes, nose, and mouth to bring the character to life.
Nature-inspired pumpkin designs
If you’re looking for a more natural and rustic look, consider carving nature-inspired designs onto your pumpkin. Think leaves, flowers, or even animals like owls or birds. Use a stencil or draw the design freehand, and carve using delicate, intricate cuts. These designs are perfect for creating an enchanting autumnal atmosphere.
Embracing minimalism with geometric shapes
For a modern and minimalist pumpkin carving idea, embrace the beauty of geometric shapes. Simple yet stylish, these designs can be achieved by using stencils or by carving clean, straight lines and angles. Experiment with triangle patterns, squares, or even a mix of different shapes. The result will be a stunning and unique pumpkin display.
With these beginner-friendly pumpkin carving ideas, you’ll be able to create impressive designs without feeling overwhelmed. So gather your tools, pick the perfect pumpkin, and let your creativity shine this Halloween.
6. Adding Extra Elements
When it comes to pumpkin carving, the fun doesn’t have to stop at just carving a face or a design on the surface of your pumpkin. Adding extra elements can take your pumpkin carving to the next level and make it truly unique. In this section, I will share some ideas on how you can enhance your carving and make it even more impressive.
Enhancing your carving with lighting
One simple way to make your pumpkin carving stand out is by incorporating lighting. You can place a small LED light inside the pumpkin to create a warm and inviting glow. This will not only highlight the intricacies of your carving but also add an extra touch of magic to your pumpkin display.
Using accessories like googly eyes
Another way to add personality to your pumpkin carving is by using accessories like googly eyes. You can easily find these in craft stores or online. Simply attach them to your pumpkin using a strong adhesive, and watch as your pumpkin comes to life with its own unique personality.
Incorporating props or accents
To make your carving even more eye-catching, consider incorporating props or accents into your display. You can use twigs, dried leaves, or even small Halloween-themed decorations to create a visually stunning arrangement.
Creating a spooky atmosphere
Lastly, if you want to create a truly spooky atmosphere, consider placing your carved pumpkins in a dimly lit area or near other Halloween decorations. This will not only enhance the overall effect but also create a captivating ambiance that will leave your guests in awe.
By adding these extra elements to your pumpkin carving, you can elevate it from a simple design to a mesmerizing work of art. So, don’t be afraid to get creative and let your imagination run wild!
Conclusion
Reflecting on your carving experience
Carving pumpkins is not only a fun and creative activity but also a great way to embrace the spirit of Halloween. Throughout this article, I have shared 10 easy pumpkin carving ideas that are perfect for beginners like myself. From spooky faces to cute characters, these designs will surely bring joy and festive spirit to your Halloween celebrations.
As I embarked on my own pumpkin carving journey, I discovered that it is important to be patient and take your time. The process can be messy and challenging, but with practice, you will improve and create stunning pumpkins. Don’t be discouraged if your first attempt is not perfect; it’s all part of the learning experience.
Displaying and preserving your masterpiece
Once you’ve finished carving your pumpkin, it’s time to proudly display your masterpiece. Place it on your doorstep or in a well-lit area to showcase your creativity to neighbors and trick-or-treaters. To keep your pumpkin looking fresh for longer, apply a thin layer of petroleum jelly to the exposed areas, preventing them from drying out too quickly.
Encouraging others to try pumpkin carving
Now that you have gained confidence in your carving skills, why not share your expertise with others? Invite friends and family to join you in the pumpkin carving fun. Share tips, tricks, and this article, encouraging them to discover the joy of transforming a simple pumpkin into a work of art.
Remember, pumpkin carving is all about creativity and having a good time. So grab your carving tools, pick a design from this article, and let your imagination run wild! Happy carving!
